AMERICAN STALINGRAD: THE FINALE PART 2
A BARROOM BRAWL AFTER THE LIGHTS WERE SHOT OUT
The night of November 12-13 was the dark of the moon. Across Ironbottom Sound there were rain squalls and thunderstorms in all quadrants. It was perfect weather for the Imperial Navy’s night fighters.
Ironbottom Sound
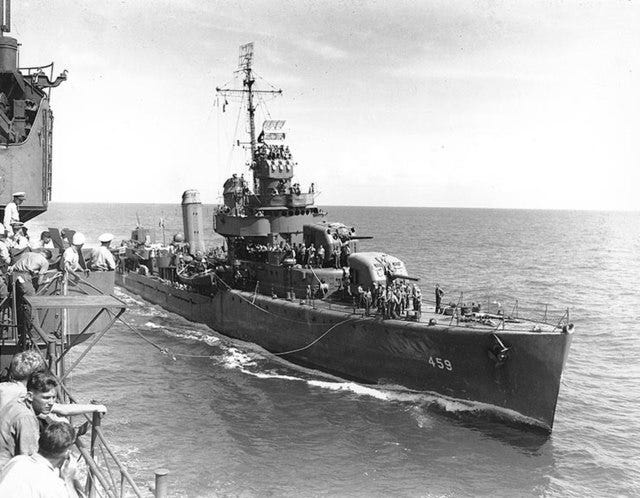
The American battle line was led by the older destroyer Cushing (DD376), followed by Laffey (DD-459), Sterett (DD- 407) and O’Bannon (DD-450). Admiral Scott’s flagship, the light cruiser Atlanta (CL-51) led the main force followed by Callaghan’s flagship San Francisco, heavy cruiser Portland (CA-33), Helena (CL-50) with Juneau (CL-52) at the rear of the cruiser line. The destroyers Aaron Ward (DD-483), Barton (DD-599), Monssen (DD-436) and Fletcher (DD-445) brought up the rear.
USS Laffey
The inexperienced Callaghan had placed Helena and the brand-new destroyer Fletcher, the two ships equipped with the newest SG radar that was less affected by the weather, at the rear of the formation. The rest were equipped with the temperamental SC radar that would be blinded at important moments by the lightning that surrounded the force. Outside of Scott’s ships, none of the fleet had operated or trained together for combat, and Admiral Callaghan did not provide any guidance through a battle plan.
USS San Francisco
At 0124 hours, Helena’s radar picked up the oncoming Japanese but the weather affected radio communications and she was unable to pass the word quickly to Callaghan, who -- when he did get the word -- wasted more time in an attempt to reconcile the information reported by radar with his limited sight picture. San Francisco, like the other ships, had no Combat Information Center (CIC) to quickly process and coordinate incoming information. Thus, the radar reported ships not in sight while Callaghan tried to coordinate the battle visually from the bridge.
During their approach, Abe’s fleet passed through an intense rain squall. His fleet was in a complex formation, and the admiral’s confusing orders split the formation into several groups just before they emerged from the storm into “Ironbottom Sound” from the west side of Savo Island rather than directly from The Slot. They thus entered the battle zone from the northwest, rather than the north as the Americans expected.
The opponents closed, each unseen by the other.
Admiral Callaghan ordered a turn to cross the enemy’s “T” as Scott had done at Cape Esperance. Moments later, both formations stumbled into squalls that affected the U.S. radar. Callaghan was uncertain of his ships’ positions when Cushing at the front of the formation visually confirmed radar contact. Callaghan refuse to order “open fire,” fearing the targets were American. His indecision was fatal.
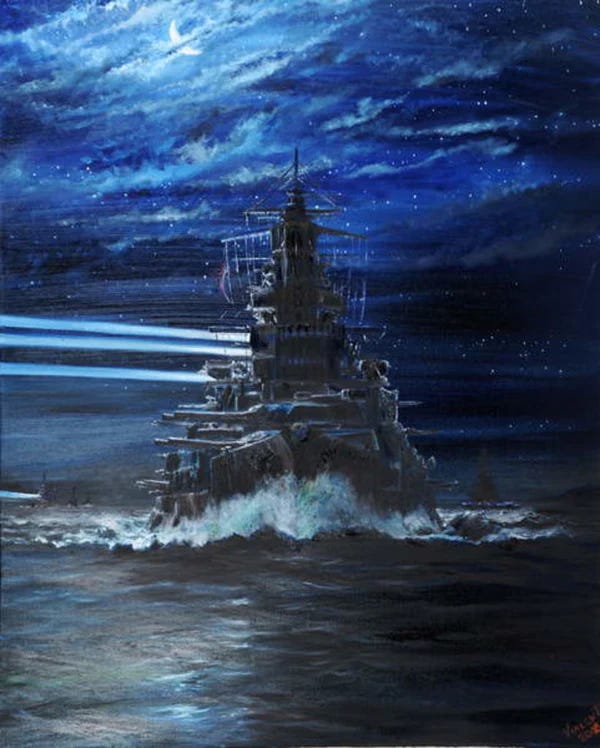
Both forces emerged from the squalls almost simultaneously. Abe was surprised to discover an unexpected American force in point blank range. Like Callaghan, he hesitated, unsure of the ships’ identity. The delay by both admirals allowed the two formations to overlap as individual captains on both sides awaited the order to commence firing. At 0148 hours, Akatsuki and Hiei turned on their searchlights, revealing Atlanta 3,000 yards distant. Ships in both forces opened fire and the two formations completely disintegrated.
Hiei lights up the US ship
Callaghan ordered, "Odd ships fire to starboard, even ships fire to port." The next moments were described by one of Monssen’s surviving officers as "a barroom brawl after the lights had been shot out." Intermingled, both sides fought in an utterly confused close-range mêlée in which the Imperial Navy’s 20 years of night battle training was deadly. All 13 Japanese destroyers were armed with the deadly Type 93 torpedo, and almost all American losses were due to this weapon they didn’t know existed.
Cushing took fire from Nagara and several destroyers, stopping her dead in the water. Nagara and destroyers Inazuma, Ikazuchi and Akatsuki then heavily damaged Atlanta with gunfire and torpedoes. With all engineering power cut by a torpedo hit, she drifted into San Francisco’s line of fire and Admiral Scott and many of the bridge crew were killed by “friendly fire.” Atlanta drifted out of control, taking more hits until she drifted out of the battle.
Destroyer Laffey - which had only been commissioned the previous March 31 and had arrived in the South Pacific in early September in time to rescue survivors of Wasp and participate in the Battle of Cape Esperance - would live up to her namesake, Seaman Bartlett Laffey, an Irish-born US Navy sailor who received the Medal of Honor for manning a howitzer at the battle of Yazoo City in 1864, despite the rest of the crew being killed, thereby turning back the Confederate assault before he was killed by a rifle shot.
Laffey vs Hiei
The destroyer narrowly missed a collision as she passed 20 feet from Hiei, which couldn’t depress her batteries low enough to hit her. Laffey raked Hiei’s superstructure with 5-inch and machine gun fire, damaging her bridge, wounding Admiral Abe, and killing his chief of staff. The battleship was also hit from close range by Sterett and O'Bannon.
Laffey was hit by fire from an enemy destroyer that knocked out her number three gun mount. With Hiei on her port beam, Kirishima on her stern, and two destroyers on her port bow, Laffey fought with her three remaining main battery guns in a no-quarter duel at point-blank range in which she was hit by a 14-inch shell from Hiei. One of the enemy destroyers fired a torpedo that hit her fantail and put Laffey out of action.
As her captain, Lt. Commander William B. Hank, gave the order to abandon ship, a violent explosion ripped her in two and she sank immediately. Of her 247 member crew, 59 were killed, including Captain Hank, with 116 wounded. Laffey was later awarded the Presidential Unit Citation. When oceanographer Robert Ballard discovered her hulk in Ironbottom Sound in 1995, her two forward guns were still aimed out.
San Francisco under fire
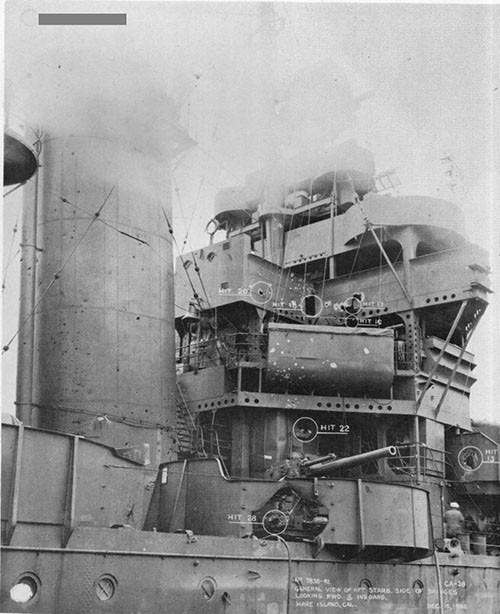
When San Francisco passed 2,500 yards from Hiei, she came under fire from Abe’s flagship along with Kirishima, Inazuma, and Ikazuchi. In two minutes she took 15 major hits and 25 lesser ones. Fortunately, Hiei and Kirishima’s shots were the special fragmentation bombardment shells and San Francisco was saved from being sunk outright. The cruiser landed one shell in Hiei's steering gear room, which severely inhibited her maneuverability.
Wounded Marine Gunnery Sergeant Tom MacGuire climbed down from the signal bridge where he was the only survivor, to the navigating bridge. Fifty years later, he recalled the scene of devastation: “There was blood everywhere, the bulkheads looked like swiss cheese. The Admiral died as I touched him. Then I saw someone stir, and I went to him.” Lt. Commander Bruce McCandless, the Communications Officer, had been knocked unconscious when thrown against a bulkhead by an explosion. MacGuire helped him to his feet and McCandless gave orders that saved the ship as she careened wildly through the battle.
The story of the saving of San Francisco is told in the three citations for the Medal of Honor which were awarded to the men who led the fight.
Lt. Commander McCandless’ citation reads:
“For conspicuous gallantry and exceptionally distinguished service above and beyond the call of duty as communication officer of the U.S.S. San Francisco in combat with enemy Japanese forces in the battle off Savo Island, 12/13 November 1942.
“In the midst of a violent night engagement, the fire of a determined and desperate enemy seriously wounded Lt. Comdr. McCandless and rendered him unconscious, killed or wounded the admiral in command, his staff, the captain of the ship, the navigator, and all other personnel on the navigating and signal bridges.
“Faced with the lack of superior command upon his recovery, and displaying superb initiative, he promptly assumed command of the ship and ordered her course and gunfire against an overwhelmingly powerful force. With his superiors in other vessels unaware of the loss of their admiral, and challenged by his great responsibility, Lt. Comdr. McCandless boldly continued to engage the enemy and to lead our column of following vessels to a great victory.
“Largely through his brilliant seamanship and great courage, the San Francisco was brought back to port, saved to fight again in the service of her country.”
McCandless sent Tom MacGuire to find Damage Control Officer Lt. Commander Herb Schonland, who McCandless believed would be the senior officer if he was alive. MacGuire found Schonland below decks in hip-deep water, leading the fight to plug shell holes at the waterline that threatened to sink the ship.
Lt. Commander Schonland’s citation reads:
“For extreme heroism and courage above and beyond the call of duty as damage control officer of the U.S.S. San Francisco in action against greatly superior enemy forces in the battle off Savo Island, 12-13 November 1942.
“In the same violent night engagement in which all of his superior officers were killed or wounded, Lt. Comdr. Schonland was fighting valiantly to free the San Francisco of large quantities of water flooding the second deck compartments through numerous shell holes caused by enemy fire. Upon being informed that he was commanding officer, he ascertained that the conning of the ship was being efficiently handled, then directed the officer who had taken over that task to continue while he himself resumed the vitally important work of maintaining the stability of the ship.
“In water waist deep, he carried on his efforts in darkness illuminated only by hand lanterns until water in flooded compartments had been drained or pumped off and watertight integrity had again been restored to the San Francisco. His great personal valor and gallant devotion to duty at great peril to his own life were instrumental in bringing his ship back to port under her own power, saved to fight again in the service of her country.”
While San Francisco continued her out-of-control death ride through the enemy fleet, Boatswain’s Mate Keppler, the man who had led the fight to put out the fire caused by the crash of the Betty earlier that day, continued his heroic actions, as detailed in the citation for his posthumous Medal of Honor:
“For extraordinary heroism and distinguished courage above and beyond the call of duty while serving aboard the U.S.S. San Francisco during action against enemy Japanese forces in the Solomon Islands, 12/13 November 1942.
“When a hostile torpedo plane, during a daylight air raid, crashed on the after machine-gun platform, Keppler promptly assisted in removal of the dead and, by his capable supervision of the wounded, undoubtedly helped save the lives of several shipmates who otherwise might have perished.
“That night, when the ship's hangar was set afire during the great battle off Savo Island, he bravely led a hose into the starboard side of the stricken area and there, without assistance and despite frequent hits from terrific enemy bombardment, eventually brought the fire under control.
“Later, although mortally wounded, he labored valiantly in the midst of bursting shells, persistently directing fire-fighting operations and administering to wounded personnel until he finally collapsed from loss of blood. His great personal valor, maintained with utter disregard of personal safety, was in keeping with the highest traditions of the U.S. Naval Service. He gallantly gave his life for his country.”
International News Service correspondent Ira Wolfert, ashore on Guadalcanal, later wrote: “The action was illuminated in brief, blinding flashes by Jap searchlights which were shot out as soon as they were turned on, by muzzle flashes from big guns, by fantastic streams of tracers, and by huge orange-colored explosions as two Jap destroyers and one of our destroyers blew up. From the beach it resembled a door to hell opening and closing, over and over.”
Marine Sergeant James Eaton, saw the battle from a hilltop and described it 30 years later: “It was the most terrible fireworks display you could ever see. In the middle of the lightning flashes all around were the bursting star shells and the bright lights of explosions as a ship was hit. The Bombardment scared me nearly to death; I can only imagine how awful it was on those ships.”
Portland was hit by a torpedo from Inazuma or Ikazuchi that jammed her rudder over and forced her to steam in a circle. As she completed the first loop, Hiei was spotted and hit with four salvoes, after which her crew was fully occupied regaining control and she took no further part in the battle.
Juneau and the four destroyers at the rear were attacked by Yūdachi and Amatsukaze, which used their deadly Type 93 torpedoes with terrible purpose. Barton was hit by two torpedoes and blew up, taking most of her crew down with her. Amatsukaze also torpedoed Juneau; the fatally-damaged cruiser slowly crept away to the east. Monssen avoided the wreck of Barton, but was spotted by Asagumo, Murasame, and Samidare just after they sank Laffey. They opened fire and hit Monssen so badly her crew was forced to abandon ship.
Amatsukaze spotted San Francisco and approached with torpedoes ready. No one aboard saw Helena until she opened fire with a 15-gun broadside that seriously damaged Amatsukaze. Before Helena could finish, she was distracted by Asagumo, Murasame, and Samidare. She chased them off with a radar-directed barrage that damaged all three.
After close to 40 minutes of the kind of brutal, close-quarters ship-versus-ship fighting that hadn’t been seen since the Age of Sail, the fleets broke contact and ceased fire at 0226 hours when Captain Gilbert Hoover of Helena, the senior surviving U.S. officer, gave orders to disengage
The damaged bridge of USS San Francisco
On the American side, only Helena and the destroyer Fletcher could offer resistance, while Kirishima, Nagara, and the destroyers Asagumo, Teruzuki, Yukikaze, and Harusame were only lightly damaged, with Inazuma, Ikazuchi, Murasame, and Samidare damaged enough to somewhat impair their fighting ability..
At that moment, it seemed that Callaghan’s do-or-die effort had failed, since the enemy could still continue on to bombard Henderson Field and allow Tanaka’s fleet to land the troops and supplies safely in the morning.
However, Abe ordered his fleet to retire. Hiei was badly damaged and both she and Kirishima had expended most of the special bombardment ammunition, which meant they might not destroy Henderson. The admiral did not know the enemy’s losses, while his ships were scattered and would take considerable time to reform. As they turned back, Kirishima attempted to take Hiei under tow, but she was flooded and her rudder was jammed hard over, which made it impossible. Yukikaze and Teruzuki remained behind to assist her withdrawal, while Samidare found and picked up Yūdachi’s survivors at 0300 hours before retiring.
The dawn revealed a terrible sight in Ironbottom Sound: Portland, San Francisco, Aaron Ward, and Sterett were badly damaged but were eventually able to restore power and withdraw for later repair. Atlanta sank that night at 2000 hours.
Helena’s Captain Hoover, the senior surviving commander, ordered the fleet to head for Espiritu Santo at 1200 hours. At 1100 hours, the badly-damaged Juneau was 800 yards off San Francisco’s starboard forward quarter, down 13 feet at her bow as waves washed over her forecastle. The Japanese submarine I-26 fired two torpedoes at San Francisco which both passed ahead of her; one hit Juneau in the same place she had been torpedoed the night before. The ship exploded, broke in two and disappeared in 20 seconds. Captain Hoover wrongly concluded there were no survivors; fearing a second attack, he ordered the fleet to leave without trying to rescue anyone.
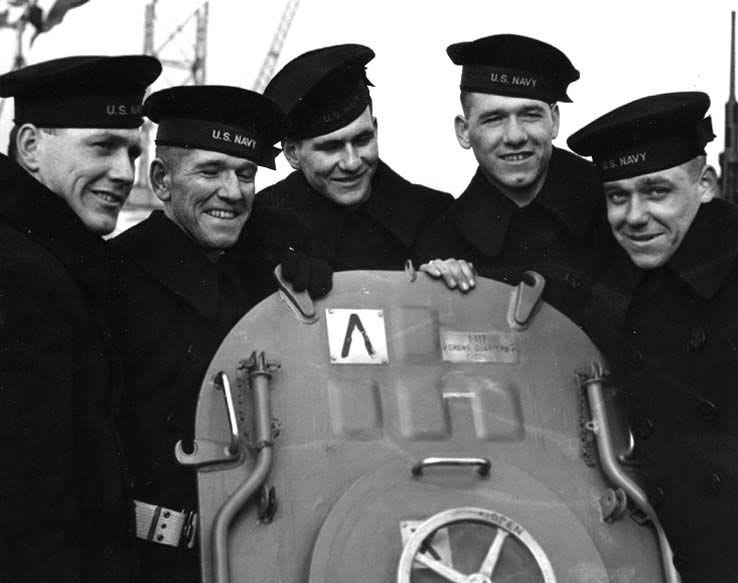
More than 100 of Juneau’s 697-man crew went into the water, including two of the five famous Sullivan brothers of Boston, who had gained considerable publicity when they all joined the navy and were assigned together aboard Juneau. The survivors were left for eight days at the mercy of the sharks before 10 were spotted in separate rafts five miles apart by passing aircraft; USS Ballard (DD-267) rescued them on November 20. Both of the surviving Sullivans were among the missing.
News of the loss of the five Sullivan brothers made it into the American press, along with the statement by one of the survivors that he had been with the last of the brothers until only days before their rescue. Captain Hoover’s decision to depart in order to save the fleet was bitterly criticized both in the press and the navy, and he was relieved of command by Admiral Halsey. Writing after the war, Halsey criticized his decision, stating that Hoover’s decision to save the fleet when stopping to search would have exposed them to further attack was right.
Dawn on November 13 found Enterprise steaming through squalls, low clouds and rain 270 miles south of Guadalcanal. At 0615 hours, she launched ten SBD scouts to search for the enemy. At 0810 hours, it was decided to reduce the number of planes aboard since the damaged number one elevator was still out of commission; if fewer aircraft were on hand, flight operations would be facilitated in case of attack. Nine Torpedo Eight Avengers led by squadron commander Lieutenant Albert P. Coffin and six Fighting Ten Wildcats were ordered to proceed to Guadalcanal for temporary duty with the land-based air force. The aircraft were airborne by 0830 hours. Fortuitously, eight of the nine TBFs were armed with torpedoes.
Shortly after dawn, the badly-damaged Hiei was discovered by planes from Guadalcanal, circling to starboard at 5 knots, accompanied by her two escorts. At 1030 hours, B-17Es of the 11th Bomb Group made an unsuccessful attempt to sink her. At 1100 hours, the Air Group Ten flight from Enterprise arrived over the sound and spotted Hiei and her escorts. The Avengers launched an attack from both sides of her bow. Two hits were scored on the port side, one on the bow, one on the stern and a final hit on the starboard side amidships. Hiei circled north and seemed dead in the water as the TBFs and their escorts proceeded to Henderson Field. At 1130 hours, two Avengers from newly-arrived VMSB-131 torpedoed Hiei, but she still refused to go down.
At 1430 hours, Hiei was again attacked by six TBFs, eight SBDs, and eight F4Fs from both Marine squadrons and the Enterprise group. One torpedo hit amidships on the starboard side and another on the stern, with a third on the port side. Two other torpedoes were duds which struck the battleship and bounced off her armor belt. Around 1500, three VT-8 and two VMSB-131 TBFs scored two more torpedo hits, while Marine SBDs hit the warship with three direct 1,000-pound bomb hits and two near-misses.
Wreck of Hiei today
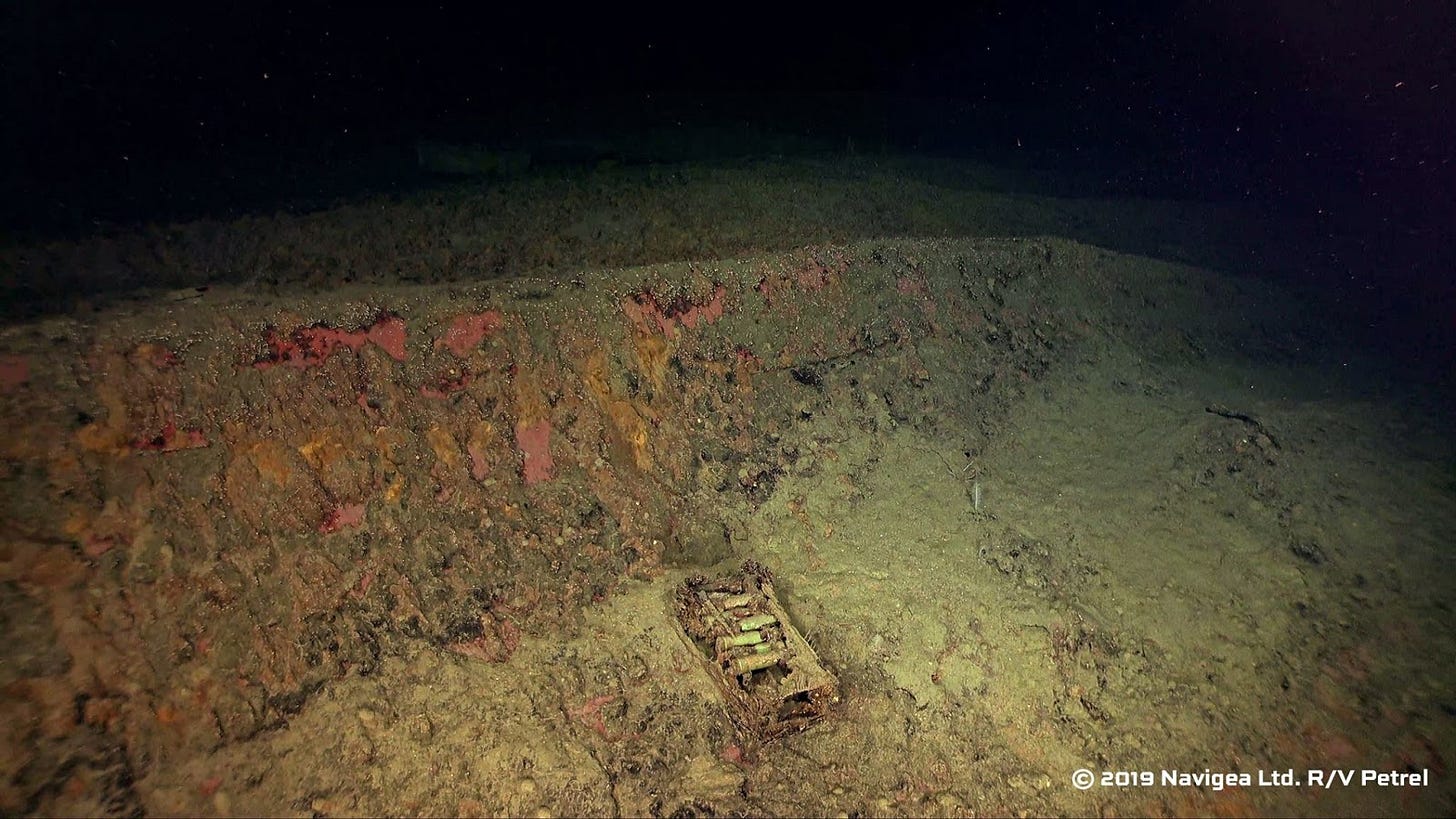
All told, Hiei was subjected to seven torpedo, five dive bombing, and two strafing attacks. In addition to torpedo damage, she had received at least four 1,000-pound bomb hits. At 1830 hours she was reported still afloat and making slow headway, escorted by five destroyers. By the next morning, she had disappeared, and an oil slick two to three miles wide was observed in the sound near Savo. Hiei was the first Imperial Navy battleship lost in the Pacific War. In 2019, the research vessel Petrel found her, upside down in Ironbottom Sound, at a depth of 900 feet.
Rear Admiral Norman Scott, the victor at Cape Esperance, who - with Admiral Callaghan - was one of only two American admirals killed in action during the Pacific War, was awarded the fourth Medal of Honor related to the battle, in recognition of his leadership in the Battle of Cape Esperance and for what might have been otherwise had he and not Callaghan led the second battle. His citation reads:
“For extraordinary heroism and conspicuous intrepidity above and beyond the call of duty during action against enemy Japanese forces off Savo Island on the night of 11–12 October and again on the night of 12–13 November 1942. In the earlier action, intercepting a Japanese Task Force intent upon storming our island positions and landing reinforcements at Guadalcanal, Rear Adm. Scott, with courageous skill and superb coordination of the units under his command, destroyed 8 hostile vessels and put the others to flight.
“Again challenged, a month later, by the return of a stubborn and persistent foe, he led his force into a desperate battle against tremendous odds, directing close-range operations against the invading enemy until he himself was killed in the furious bombardment by their superior firepower.
“On each of these occasions his dauntless initiative, inspiring leadership and judicious foresight in a crisis of grave responsibility contributed decisively to the rout of a powerful invasion fleet and to the consequent frustration of a formidable Japanese offensive. He gallantly gave his life in the service of his country.”
The U.S. Navy announced seven enemy ships were sunk and that the enemy withdrawal was a significant victory. When the Imperial Navy’s records became available after the war, the Navy found it had suffered one of the worst defeats in the service’s history.
Despite this, the outcome was strategically important. Henderson Field was still intact.
This concluding episode of “American Stalingrad - the Battle of Guadalcanal” is free to all subscribers this weekend. You can access the entire series as a paid subscriber, and there will be more special projects in the future.
Comments are open to all subscribers (until a troll shows up).





Wow.
I read Hornfischer's account and he went into more detail about the decision Capt. Hoover had to make after the Juneau went down. He had only one undamaged destroyer and a lightly damaged one to screen his surviving cruisers, so he made the hard decision to go on. He did blinker the ship's last known position to a B-17 that was overhead, requesting rescue for the ship's survivors, and the transmission was acknowledged by the bomber, but word was not passed in time.
Both Admirals Nimitz and King did not concur with Halsey's report criticizing Hoover's actions, with Nimitz actually recommending Hoover for another major command after a period of rest. But in the end, Hoover never got another sea command. He retired as a Rear Admiral in 1947.